Beiträge von JGB

    Hallo liebe Orgelfreunde,


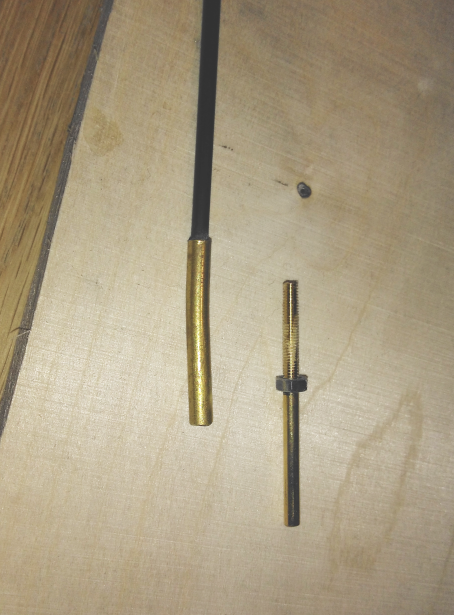
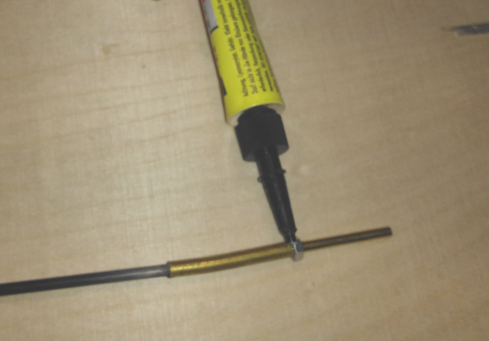
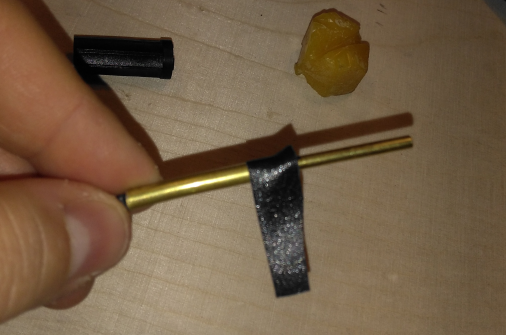
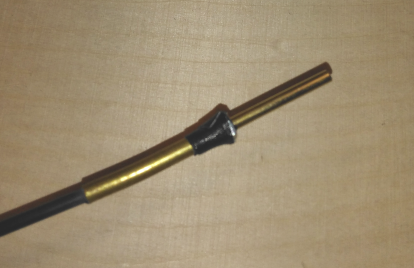
    die tiefe Oktave ertönt jetzt auch! Ich habe die Reflexlichtschranken angeschlossen, die die Stecherbewegung abnehmen und elektrisch weiterleiten. Ich habe ein bisschen experimentiert und als recht gut haben sich kleine schwarz/weiße "Fähnchen" erwiesen. Sieht die Reflexlichtschranke "schwarz", ertönt kein Ton, sieht sie "weiß", ertönt der Ton. Hier ein Bild von der Montage dieser Fähnchen. Sie sind auf die Holzklötzchen geklebt am unteren Ende der Stecher. Gegen Verdrehen sind die Klötzchen gesichert durch zusätzliche Abschnitte aus Alurohr die ich zwischen den Klötzchen platziert habe:


    IMG-20220325-205225948-klein.jpg


    Die Aluröhrchen musste ich etwas in eine ovale Form "quetschen" damit sie zwischen den Klötzchen Platz finden. Aber es hat ganz gut geklappt; habe sie dann mit einer Schraube von oben fixiert.


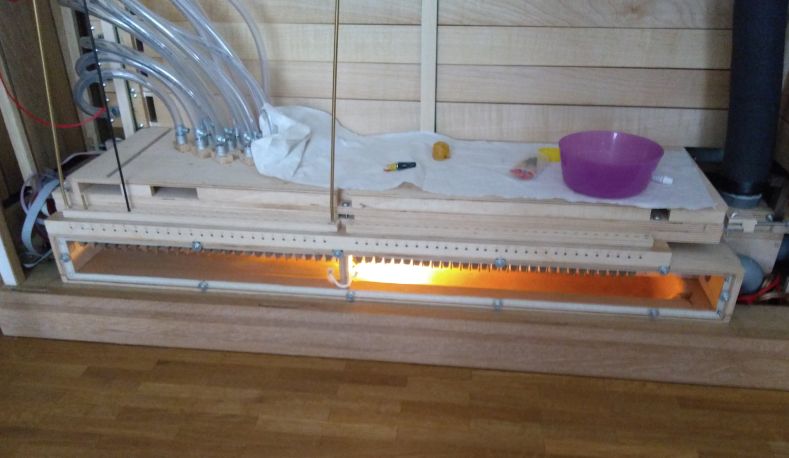
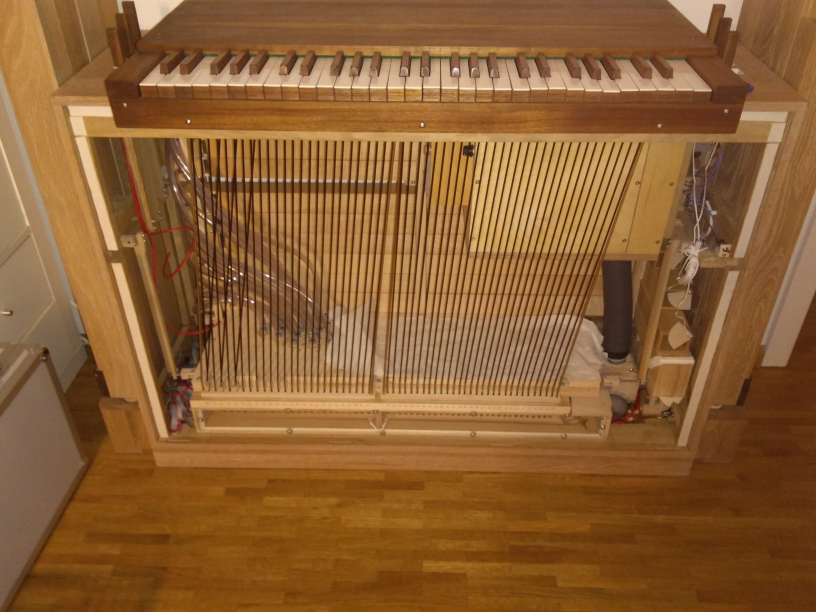
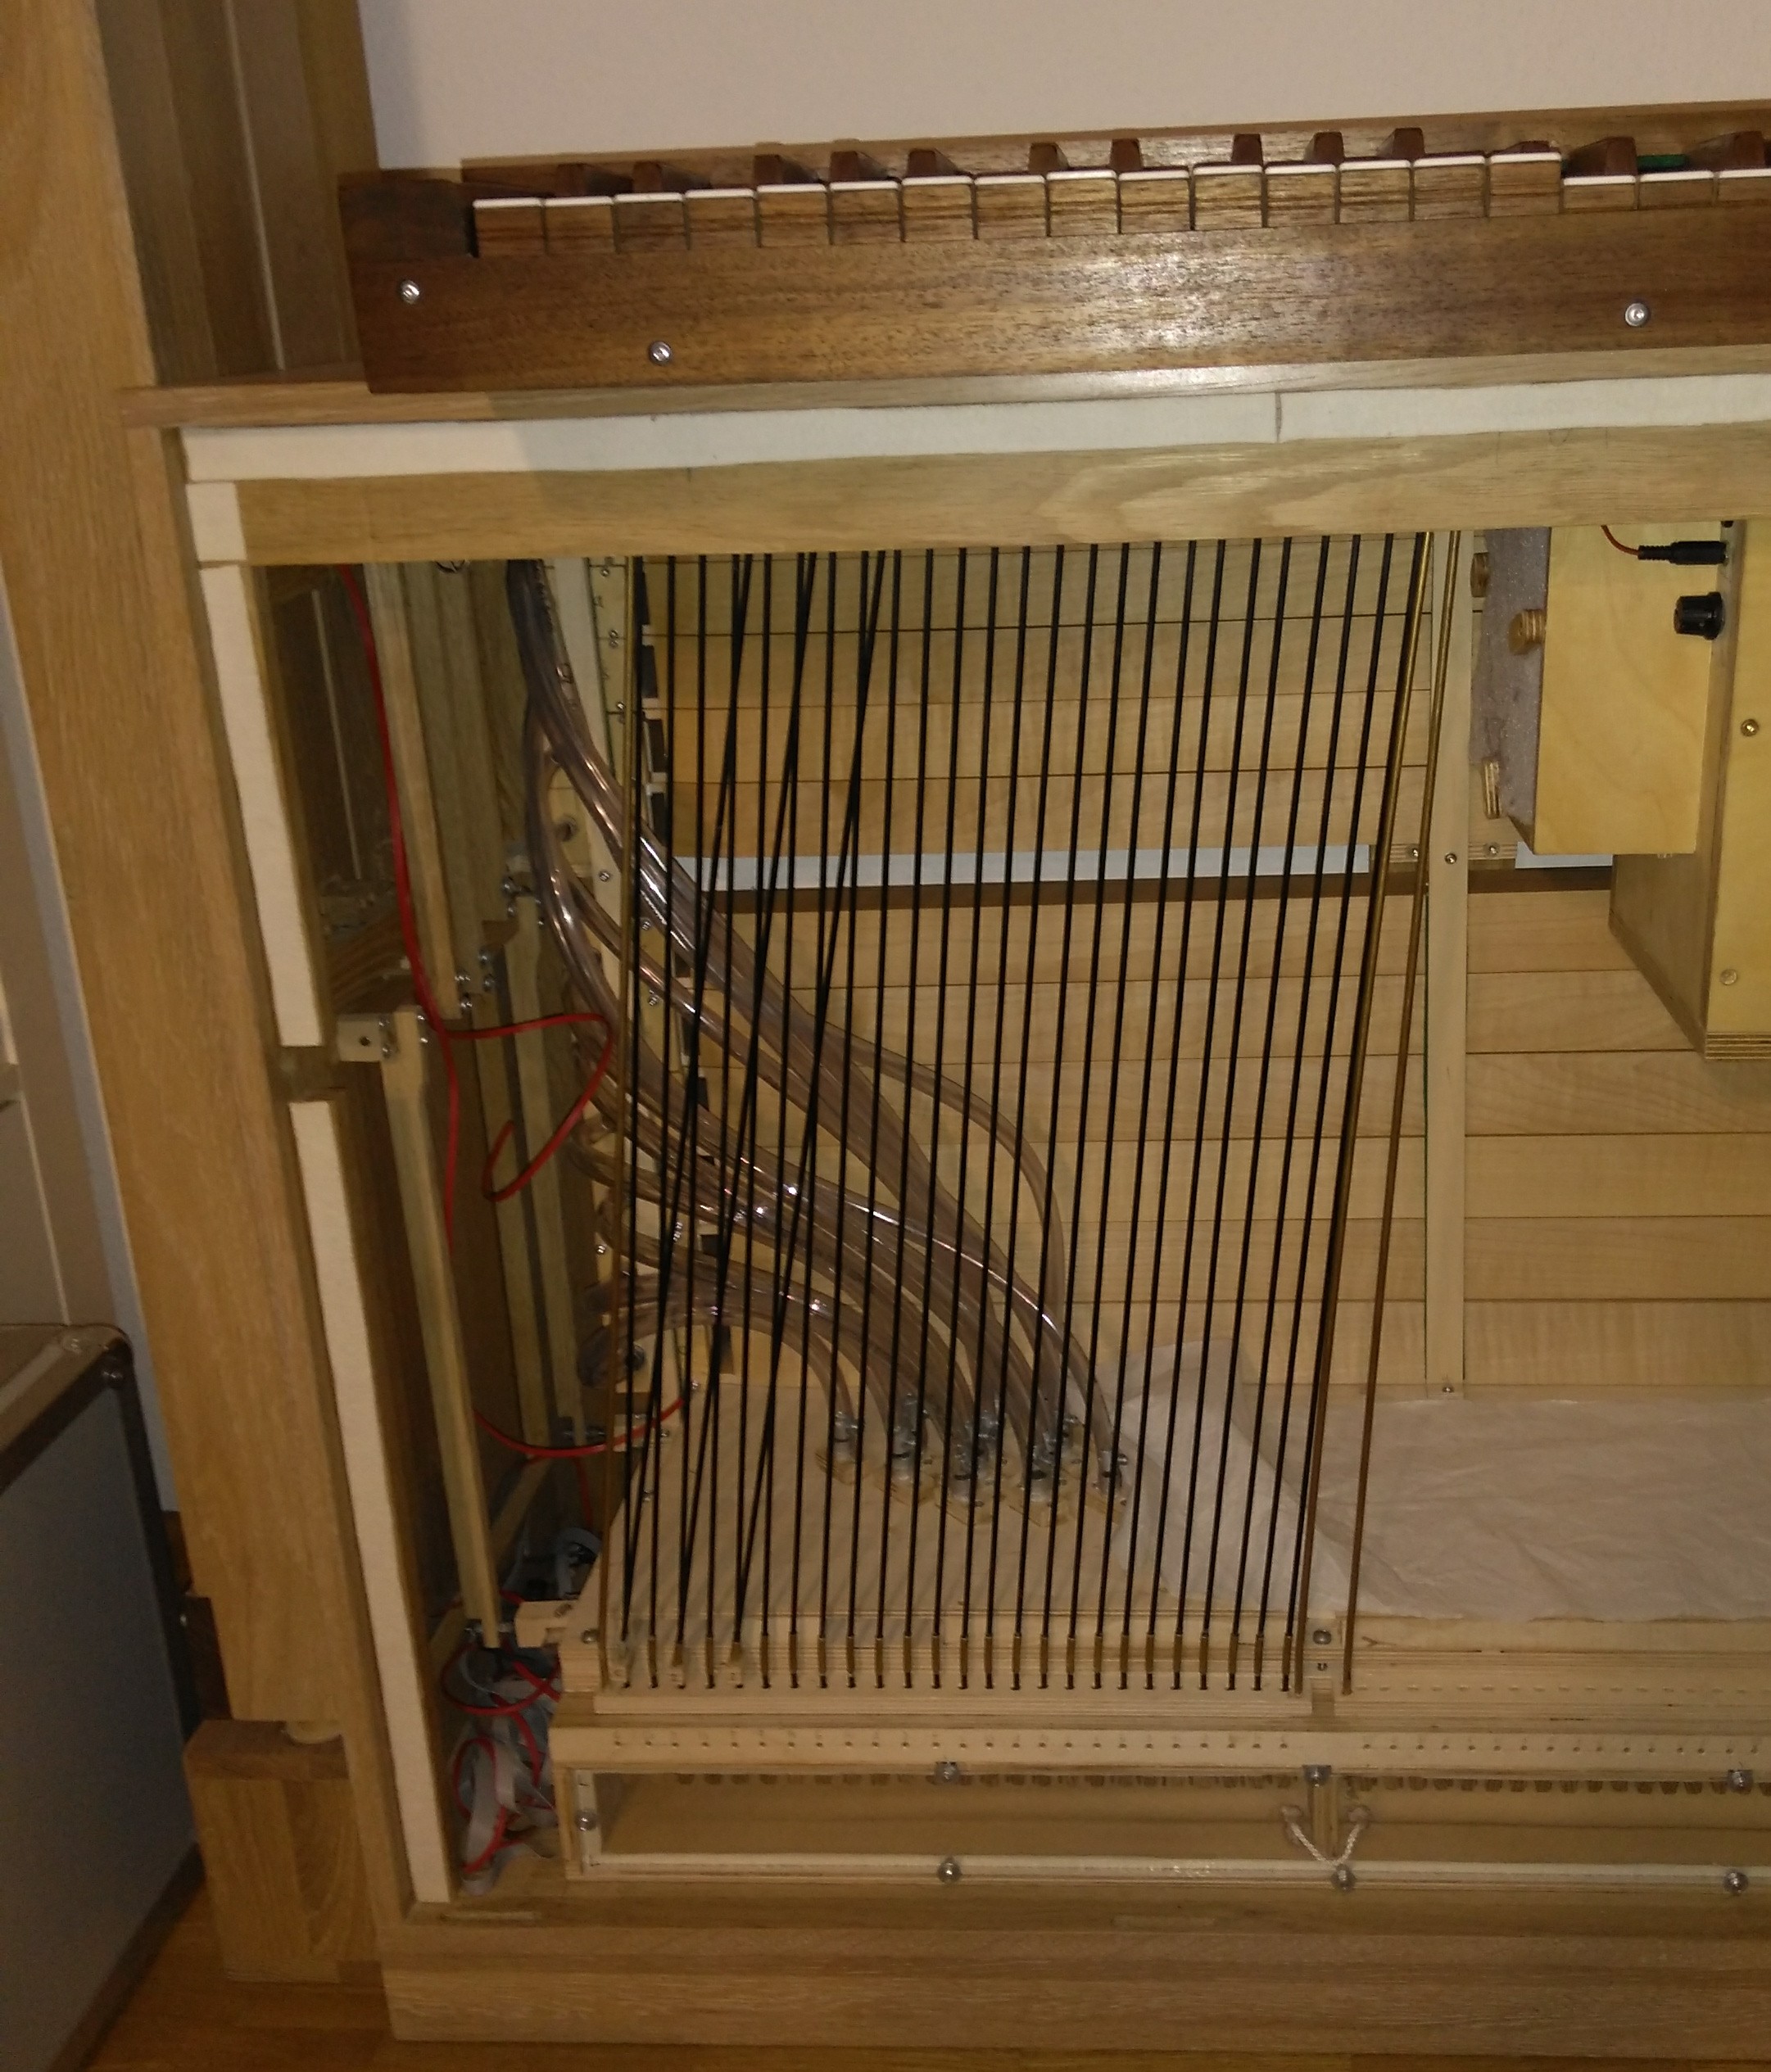
    Als nächstes kamen die Reflexlichtschranken dran. Ich habe jede auf einem kleinen Streifen Lochrasterplatine festgelötet und diese Streifen mit einem Langloch versehen, so dass man den Schaltzeitpunkt regulieren kann. Alle Streifen sind auf einer Holzleiste festgeschraubt (Schraube durch Langloch) und diese Holzleiste ist drehbar an der Windlade angebracht so dass man zu Wartungszwecken alle Lichtschranken zur Seite schwenken kann. Dadurch, dass keine mechanische Verbindung besteht, kann man, wie zuvor auch, den Rahmen mit den Stechern nach oben hin entnehmen und kommt später zum Stimmen leicht an die Pfeifen dran, obwohl die Stecher vor den Pfeifen verlaufen.


    Hier das Bild mit den Lichtschranken:


    IMG-20220325-212802782-klein.jpg


    Die Lichtschranken sind etwa 5 mm von den Fähnchen entfernt. Und hier noch ein Video mit der ganzen Sache in Aktion:


    https://www.youtube.com/watch?v=BMTL5LrkWho


    Als nächstes werde ich die Basspfeifen, die nun auch spielbar sind, intonieren. Sie sind noch sehr unterschiedlich laut und die Kernspaltweite noch nicht endgültig definiert. Jetzt kann ich die Lautstärke optimal an die Innenpfeifen anpassen.


    Gruß,


    Jens

    Hi Xiaohu, the separate slots are only needed for the octave transmission. Above the holes of the sliders, always two channels are combined together and go to one pipe, so almost every pipe is "multiplexed" to serve as 8' and as 4' stop. Now, if you connect wind channels, the wind could travel from one channel/ventil to the other and play pipes that aren't supposed to play. For example, if you connect c0 to c1 and c1 is connected to c2 and so forth, pressing any C key would play all of the C pipes because all of the C channels are somewhat connected to each other. This can be dealt with by some additional ventils/flaps that let the wind only go through in one direction like a diode, or, which is much simpler, by dividing the ventils into two parts: One ventil sits on two slots and each slot only is connected to only one pipe. This avoids the trouble with the wind going everywhere. The lowest 12 notes are electrically triggered, so a divided slot is not needed for those notes.


    Of course when you don't have that kind of transmission, you won't need separated slots and the wind chest becomes easier to build but you need space for individual pipes/registers.


    Regards, Jens

    Hallo liebe Hausorgelfreunde,


    die letzten Tage und Wochen habe ich mich mit Elektronik für die Orgel beschäftigt. Das war auch immer eine gute Ablenkung, denn wenn man in den Nachrichten sieht, was auf der Welt passiert, wird's einem schlecht... Also beten, spenden und sich ablenken um nicht verrückt zu werden.


    Ich habe zwei Platinen bestückt weil auf einer Europlatine mit 160x100 nicht genug Platz war. Die Größere ist die Ansteuerung der Töne c0-d', was ausschließlich für ein später gebautes Pedal zur Ansteuerung nötig ist. Diese Töne sind auch mechanisch über die Manualklaviatur anspielbar. Ich dachte mir aber, ich baue es lieber gleich mit ein wenn ich schon dabei bin. Die Kleinere Platine ist die Auswertung für 12 Reflexlichtschranken und der Ausgang geht an die Pedalwindladen links und rechts am Gehäuse. Zusätzlich kann die Pedalansteuerung auch noch mit in die Pedalwindladen einspielen, so dass C-d' elektrisch verfügbar sind.


    Hier ein Bild der Platine für die Töne c0-d'. Es sind 15 MosFET's mit meiner schon vorgestellten Schaltung für "sanftes" Abfallen der Magnete um Klopfgeräusche zu verhindern, einstellbar per Poti's:


    Treiberplatine.jpg


    Hier beide Platinen eingebaut. Ich habe sie auf der Bassseite untergebracht:


    Platinen-eingebaut-klein.png


    Ein paar Drähte hängen noch rum und müssen noch ordentlich verstaut und angeschlossen werden. Sie sind zum Ein/Ausschalten der Reflexlichtschranken (gekoppelt an den Registerzug) und ein anderes Paar zum Ein/Ausschalten eines Tremulanten, sollte ich mal einen bauen.


    Natürlich ging beim Bau auch nicht alles gut, so sind mir 2 Komparatoren (LM339) und 2 Poti's "abgeraucht" ;-) Aber jetzt tut's.


    Gruß


    Jens

    Hi Xiaohu, the position where you place the miter isn't critical. Some builders make a two-times-45-degree miter to improve sound, but I think it's only worth it for open pipes. I had some problems with an open pipe that had two miters (the principale c pipe in my organ), but it's rather the narrow scale that caused that trouble. As long as the air can oscillate at the miter, it will work. In case of doubt, just glue in a block of wood at the miter to have a "45 degree wall" for the air to bump against. I will have a look if I have some pictures of that. Regards, Jens

    Ah, nice that you found the preview. If you want the rest of the book, maybe we can find out a way that I can send it to you (for example you send me money, I buy it for you, scan it and send it through e-mail). We have to find a "legal" way though so we don't violate copyright. Just let me know if I can help you out.#


    Maybe, the author also has the possibility to provide you an electronic version if you ask him kindly ;-)

    Hi Xiaohu,


    you're asking many questions. That's fine, keep going... But if you feel the need for some basic literature, let me know. This may answer many questions. Here's one page where you could order the "Bouwplan voor Kistorgel" book: https://www.johnboersma.nl/bouwboek3-english.html but I don't know the regulations for sending to China. I would certainly build details differently that described in that book, but I like it as a source of inspiration. In general, get as much inspiration as possible and look at many different instruments as possible, live or via internet or books. There will be many "aha" effects where you will think: That's a neat solution, I'll take that one!


    Back to your question: It doesn't matter how the air arrives at the pallet box as long as it is stabilized (pressure regulated) and the opening to the box is big enough. You can pressure regulate externally by a bellows/ventil combination or you can build it into the pallet box. Having an external bellows can make maintenance of it easier but it makes the instrument bigger. One solution for that is building it into organ bench. There are even builders that build whole pedal registers into the bench like this one: https://www.youtube.com/watch?v=vfAWUfV-tsY.


    Regards, Jens

    I got the RG148-1200-3633 that runs on 230v instead of 24 Volt. Maybe the Power rating is different for that model. That blower has a regulation input to adjust the RPM. Btw: There ist no "too big": If you draw less wind from the blower, the power goes down automatically. The 120W of your blower will be the maximum when you let it blow out freely without air flow restriktion. Regards, Jens

    Regarding the rg148: Just Google for "ebmpapst rg148 data Sheet", then you find the PDF. It can deliver 1,9 cubic meters at 3200 Pa (320mm) so you have to regulate it down in pressure. The blower can do that but you need to build the electronic interface for that. If you're interested: There was a whole thread in this topic which you can find in the forum here. Nice thing about the blower ist that it is very compact in size. Regards, Jens

    Hi Xiaohu, pressure in Pascal is about ten times the pressure in millimeter of water column. If you want 45mm or 450 Pascal in your instrument you have to add a little bit in order to have some margin for pressure regulation with the bellows/ventil combination. So I would suggest having a blower that can deliver 60mm or 600 Pa. There are also special organ blowers in the market like the ones from organparts.info but they are rather expensive. If you can afford it, take such a special blower: they just work as intended. Else, you have to experiment a little bit. I use a 2nd hand ebm RG148 blower (now ebmpapst) that can be regulated. But it can only handle about 1 or 2 organ stops. Regards, Jens

    Hi Xiaohu, the height of the pallet box (which also works as bellows on my Instrument because the bottom can move) is 50mm on the inside. I don't think that the height is very critical. You may have to think about enough space to be able to get to the springs if there is some error to be fixed. This has the advantage that you don't need to disassemble everything when something blocks or hangs. Regards, Jens

    Hallo liebe Hausorgelfreunde,


    der Bau geht weiter. Hier erst mal ein Bild mit beleuchteter Windlade:


    8fds5y3e.jpg


    Dann hier noch eine kleine Bilderserie, wie ich den Reguliermechanismus an den Stechern gebaut habe:


    Die Einzelteile: Karbonfasterstange mit Röhrchen aufgeleimt, Stück Messingstange mit Gewinde aufgeschnitten, Standard-M3-Mutter:


    nv4q83ys.png


    Das Gewinde ist etwas eingewachst damit der Sekundenkleber beim nächsten Schritt nicht am Gewinde ankleben kann. Dann Sekundenkleber (in Gelform) an der Mutter angeben:


    i56ibv89.png


    qrnumq67.png


    Dann etwas Gewebeklebeband um die frisch geklebte Stelle wickeln damit die Finger sauber bleiben und die Klebestelle trocknen kann ohne dass sich etwas bewegt:


    u6pajsfh.png


    Dann Ausdrehen der Messingstange aus der Mutter, neu Bienenwachs ans Gewinde und wieder eindrehen, fertig!


    dm46kd89.png


    Zur Längenregulierung muss man dann nur noch an der Messingstange mit Gewinde drehen. Das geht gut von Hand ohne Werkzeug. Das gewachste Gewinde sorgt dafür, dass ein gewisser Halt da ist und sich nichts von alleine verstellt.


    Hier nun alle Stecher eingebaut:


    csg42xc7.png


    Dann habe ich gemerkt, dass die Ganztontasten schon einiges schwerer sind als die Halbtontasten. Vor allem die Taste f3 war problematisch da sie ja über die ganze Länge breit ist und damit schwerer als die anderen. Daher habe ich die Tasten von unten mit einem Forsterbohrer ausgehöhlt um das Gewicht anzupassen. Hat gut funktioniert. Jetzt läuft jede Taste leicht, aber nicht zu leicht.


    Als nächstes baue ich die Elektronik um die 12 tiefsten Stecher mittels Reflexlichtschranke abzunehmen um die 8 Pfeifen/Doppeltonpfeifen anzusteuern. Die Bauteile sind inzwischen eingetroffen und ich habe mit einer Schaltung experimentiert die hoffentlich gut funktioniert. Demnächst werde ich das auch vorstellen, dann kann ich hoffentlich schon 2 Oktaven auf der Orgel spielen.

    Dann würde für ein einigermaßen komplettes Instrument nur noch der Bau und die Intonation der Pfeifen c1-f4 fehlen. Das Holz dafür ist bereits zugesägt. Ich sehe endlich Licht am Ende des Tunnels ;-) Pedalklaviatur und Tremulant werde ich irgendwann später nachrüsten.


    Schönes Wochenende Euch allen!

    Hello Xiaohu, your keyboard is ending on note E. That's a bit strange because the "usual" compass is rather up to a2 (renaissance), c3 or d3 (baroque) or f3/g3 (later). If you prefer to play music after the baroque era, I would suggest to go up to at least f3 which is one note more as far as I can tell. Regards, Jens

    That will work. Consider that you may need to lift the keyboard at the front while shifting to not "scratch" the keyboard at the bottom with the rods/stickers. Another simple solution is just to have a block of wood with the thickness of one key which can be added at the left or right of the keyboard. Then, you don't even need a dowel pin. I saw this on harpsichords:

    Hello Xiaohu,


    congratulation to your decision to build an instrument. Theo Koele was also an inspiration to me; he makes nice sounding instruments and the many images and videos on youtube and on his website helped me also a lot.


    Your drawings look fine, I think that they will work. I didn't check the exact measurements, but when you follow some norm, such as the BDO norm or the AGO norm of keyboards (or measurements near those norms), it will work. Taking measures from existing instruments is of course also an option.


    Finishing it in one year is indeed challenging. I would rather say that about 5 years is more realistic. Let's say, a professional organ builder finishes an instrument like that in a quarter of a year, working 7 hours a day on it. This would be about 90 days time 7 hours = 630 hours. When you have about one hour per day to build, this would equal 630 days, which is almost two years. If you have only about half an hour, this doubles to about 4 years. That's only a rough estimation. It also depends on the family situation and if you can work on it at the weekends or vacation or if you are going to use existing parts. But sorry, I didn't want to discourage you. Just try and start and have fun, but don't be discouraged when it will take longer than expected ;-)


    I didn't build my keyboard all by myself. I got a used one out of eBay and made new key toppings. I used plastic key covers like these: https://organparts.info/en/21-manual-keyboard?p=2 and made the accidental covers (C#, Eb, F#, G# Bb) by myself out of wood.


    Regards,


    Jens

    Kleines Update: Alle Stecher der Basshälfte (C-c') sind eingebaut. Jetzt baue ich die Stecher für die Diskanthälfte und sobald die bestellten Elektronikbauteile da sind, werde ich die Leiterplatten für die Reflexlichtschranken bestücken, die die Töne C-H optisch abnehmen und die äußeren gedeckten Pfeifen ansteuern.


    Hier ein Foto vom aktuellen Zustand:


    5ty96mh3.jpg


    Gruß, Jens

    Hallo SamES, danke! Die Klaviatur muss ich zum Glück nicht ausbauen zum Umschalten; leicht vorne anheben reicht aus, dann komm ich an den Stecherrahmen dran. Mit dem Hebel müsste ich nachdenken wie man das machen könnte... Vielleicht eine Holzleiste am Mittelpunkt des Rahmens einhängen so dass man dran ziehen oder drücken kann. Um's Anheben komme ich aber leider nicht drum rum da in der Unterseite der Tasten Löcher sind, in denen die "ungenutzten" Stecher verschwinden.


    Gruß, Jens